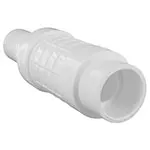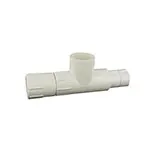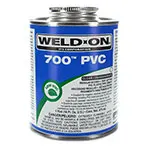
There are many ways to glue PVC pipe and a number of solvents. The bright side is most of them will work. The down side is many of them won’t, wasting time and money, or only appear to work until the pipe is long buried. Then it becomes expensive.
We are going to discuss measuring, fitting and gluing pipe. The premise is that if you do it correctly you only do it once. Not to mention limiting trips to the hardware store and controlling blood pressure.
Before we do anything else, there are two warnings. One on safety, one on product performance.
- Folks, these are harsh chemicals. Don’t get them on your skin. Definitely don’t get them in your eyes. No breathing fumes. Make sure you have plenty of ventilation, as in ‘do it outside’. Wear gloves. Wear eye protection. Care to guess what the cement does to plastic contacts or your expensive glasses?
- There is such a thing as too much glue. This is not Elmer’s Paste. If you put too much cement on and it has a chance to puddle it can and will eat through the pipe or fitting. Now you have a hole in the fitting. Also, too much glue when attaching valves can drip into the valve body and cause failure.
First, get these things together:
- Rags
- Primer and cement
- Something to put the pipe on while you cut (sawhorse, cinder block, table, etc.)
- Gloves
- Hacksaw
- Marker or crayon
- Rough file or course sandpaper
Optional but you should have
- Miter box
- Pipe cutter, preferably ratcheting type though standard will work fine.
- Hammer/Channel Lock pliers
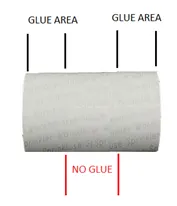 Measuring is the shortest part of this paper. Remember that you have to include the length of pipe that goes into the fitting and the length of the fitting. Say you have a 10’ section from corner to corner. The fittings add length. You need to figure out how short to cut the pipe so you can add the fittings and still get 10’. How far does the pipe go into the fitting? Depends. Depends on the cut, the pipe, your strength. There is a stop designed into the fitting. How far in is it? To find out, take the pipe and fitting, get them wet with water only, and push the pipe into the fitting with firm but not killer force. The water makes it easier to slide them together. Now take a pencil and mark the pipe at the edge of the fitting. Twist the pipe back out. The distance from that mark to the end of your pipe is your glue area. This can vary depending on fittings and pipe size. Measure everything twice. Write it down.
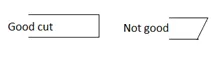 Cutting the pipe is more important that people realize. The cut should be square and smooth. If you don’t cut it square the short end will not make complete contact with the inside of the fitting and will not bond as it should. It helps to use a miter box, if you can, or good ratcheting cutters. Take your time. It will help avoid problems later.
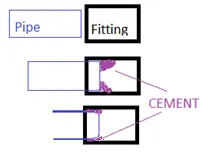 Ideally the end of the pipe should be smooth with tapered edges. Now I know you don’t hear many people talking about tapering a PVC pipe edge. You’ve probably never seen it and I know many professionals that have never even heard of it. However, we’re discussing the correct way to do this. You can bring in the shortcuts when I’m not looking. If you have a simple square cut pipe it has a tendency to push the cement ahead of it, as in the drawing. A smooth pipe with an edge taper lets the cement flow between the two. So take your file, file off the burrs that are left from the cutting, if any, and add a quick taper to the end. At the very least use sand paper to smooth the edges and take off any burrs.
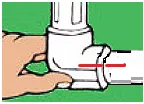 On to fittings. Once you have your pipe cut do a practice assembly. We do this to make sure we don’t glue the elbow on facing the wrong direction. Lay the pipe out along the trenches. Put the elbows, Tee’s and 45’s on just as if you were putting it in the trench. Once you are sure it is correct draw a line on the fitting and pipe with a marker or crayon. This will help line it up for you when the cement is on and drying fast.
Ok. Pipes are cut, fittings are ready. Now time for primer and glue. First I’d like to clarify one thing. It’s not really glue or cement. It’s a solvent. The solvent basically melts the PVC. When two pieces of PVC are joined using PVC cement the plastic melts, molecules blend, and it re-solidifies to a single unit. That’s a gross simplification of what happens but its close enough. When the cement is through and the PVC has re-solidified it is now the strongest piece. If you do it right the fitting or pipe will break long before the joint.
The first thing you do is make sure the pipes and fittings are dry. There are some cements that don’t need primer and will work with a wet pipe but we tend to avoid them. First, using primer gives us a last chance to check the pipe. You’d be surprised how often a small crack will hide until the primer hits it. . The other reason is that special cement tends to set FAST. Real fast. No room for error or hesitation. Why ask for trouble?
Now prime both the pipe and the fitting. Use just enough to do the job. Too much doesn’t gain you anything. Using the included dauber wipe the glue area of the pipe and the glue area of the fitting with primer. Since it’s purple it’s easy to keep track. By the way, it stains everything so be careful. Primer removes dirt and grease and preps the PVC. When PVC is formed it has a hard, clear coating on it. This is resistant to the cement. Primer removes the coating, exposing the PVC.
Now apply the cement to both pieces. Do the fitting first. Since the cement is inside you can lay it down for a moment while you coat the pipe. Once both are done push the pipe into the fitting, turning about ¼ to ½ turn as you go. This makes sure the cement spreads evenly. Hold it together for about 15 to 30 seconds. Because of the chemical reaction and the way the fittings are formed there is a tendency for push back. The pipe will want to come out so hold until is sets. If you’ve done everything correctly you can look around the edge of the fitting and see a little glue bead that has been push out by the fitting. It should be continuous. A gap might mean a pinhole leak later. Wipe off any excess cement.
I know. I didn’t say what you did with the pliers or hammer. That’s ok. They are always good to have.
That’s it. Doing takes far less time than reading about it. Doing it correctly doesn’t add any time and sure can save you a headache in the future.
 Teflon® tape (polytetrafluoroethylene, or PTFE), AKA plumber’s tape, is a thin film used to seal pipe threads. The tape is durable, flexible, and fills in the minor imperfections in the threads to seal leaks.
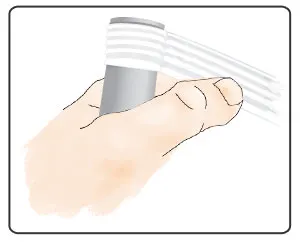 tightly into the threads but not so tightly that the threads cut through. Keep going in a flat uniform manner until you come to the ends of the threads/pipe. Now thread the pipe in carefully and you’ll have a good seal.