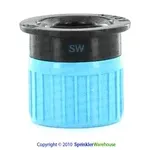
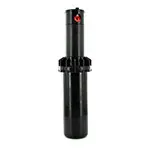
Watering Trees


Trees clear the air, provide homes to wildlife, offer shade for picnics, and, without trees, there would be no tree houses or tire swings. They also add value to your dwelling, increasing the visual appeal and adding to the livability of your home.  Trees are a vital part of our lives, directly and indirectly.

The drought that hit the United States has damaged or killed millions of trees. Texas has been particularly hard hit but the damage extends from New Mexico to Florida. By one estimate, Texas has lost approximately 500 million trees, with other states suffering various levels of damage. Unfortunately, the drought is predicted to continue through 2012.

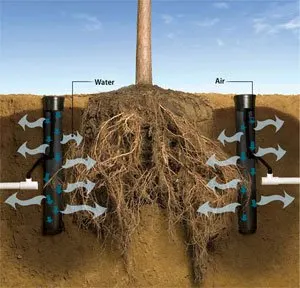
The question then becomes: what is the best way to water a tree? Ideally, the method chosen will provide the greatest amount of benefit to the tree while using the least amount of water.  The first thing to know is where to water your tree. Watering directly at the trunk is not only a waste of water but can promote some diseases. There are a few simple guidelines to follow for established trees.

First, the water needs to get to the roots. Watering too little, or just surface watering, will cause shallow roots, weakening the tree and leading to more drought damage. Deep watering to about 10” to 18” inches below the surface is best, depending on tree size. The older, more mature tree the deeper you should go.

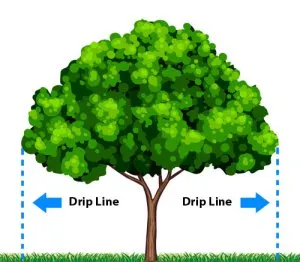
For most trees, irrigate within the drip line. The exception is evergreens, as they tend to grow up and not out. For these, imagine the drip line to extend a couple of feet outside the physical drip line.

This Drip Line is basically the furthest most extent of the leaves, as shown in the picture of the tree. Inside this area is where the plant is growing smaller roots known as Feeder Rootlets.  These absorb moisture and nutrients from the soil.

The objective is to water slowly, dispersing the flow of water to get the water deep down to the trees roots.

Don’t dig holes in the ground in an effort to water deeply. This exposes the roots to air and dries out roots even more. Watering at ground level with a sprinkler system does help. However, running your sprinkler system long enough to provide sufficient water for trees would result in a great waste of water in other areas and increase chances for water runoff.

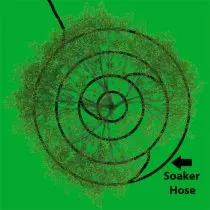
There are a number of ways to provide water at the proper rate and in the proper place, saving both the tree and water. The first, and simplest, is through the use of soaker hoses. Simply place rings within the watering area and turn the system on. The water goes where it is needed with little waste. The disadvantage is the labor involved in placing the hose, turning it on and off, removal and replacement for mowing and raking, and the possibility of damage to the hoses, requiring replacement. While efficient in water placement this method does require a bit of effort.

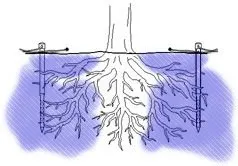
A more efficient method is the use of deep watering systems. One system involves using tree watering stakes. These range in lengths from 14” to 36”, connect to your watering system, either drip or garden hose, and put the water where it can be best utilized. This way the roots are sure to receive the water without worry of wind or run off.

Finally, there is a root watering system that attaches directly to your irrigation system. These provide the needed water and have minimal visual impact on the yard, as they are installed at grade. Since they are attached to your irrigation system you have the ability to set the watering schedule as needed without the frequent labor needed with soaker hoses or garden hose attachment.

Whichever system you choose, the key to tree survival is proper watering. Too much, too little or watering in the wrong place can cause further harm to the tree. Proper watering can extend the life, health and beauty of the tree for years to come.

For more information about anything involving irrigation, please visit us at www.SprinklerWarehouse.com.

How to Identify the Size of the Water Meter & Supply Line


A critical step in designing an efficient irrigation system is determining how much water you have available, its flow and pressure. Start at the meter. It is usually near the curb buried in a meter box.

To find the meter’s size first look at the dial. Many meters have their size located directly below the gallon count. Sometimes it is stamped on the metal below the dial face. It will be something like ¾” or 1”, in most residential cases. Sometimes it’s not there or so dirty you can’t find it. In that case you have two choices. The easiest might be to simply call your water company and ask. They’ll have it on record. The other option, which is far from accurate but is safe for design, is to determine the size of the pipe leaving the meter and assume the meter is one size smaller. It is fairly common for the meter to be one size smaller than the feed pipe to the house. Typical water meter sizes are: 5/8″, 3/4″, 1″, 1 1/2″.

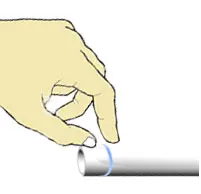
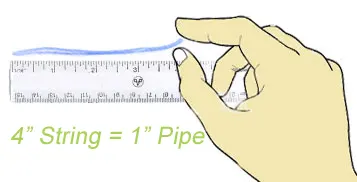
If you can’t read the pipe size on the pipe leaving the meter, don’t worry. DON’T GUESS. Also, don’t lay a ruler across it and use that measurement. If you have PVC you might be lucky enough to see the size printed on the pipe. If not,  or if  it’s not PVC, we have to measure. First, find a piece of string. Now, wrap the string around the pipe and mark the point where the string crosses.  The length between the marks gives you the pipe size.

Measuring PVC pipe using string Measuring Pipe Using String
Pipe Size Conversion Chart- Nominal Pipe Size to Circumference
Nominal Pipe Size
Approximate String Length in Inches
Copper Pipe
Galvanized Pipe
PVC Pipe
½”
2″
258″
258
58″
238
N/A
N/A
¾”
2¾”
3516
3516
1″
3½”
418
418
1¼”
4516
5316
5316
1½”
518
6″
6″
2″
6¾”
7716
7716

It is important to know what your pipe is made of. PVC tends to be white or grey (usually white), sometimes with lettering on the side and is plastic.. Steel grey and is magnetic, so that’s a quick test if there is any doubt. Copper will turn to a dirty green color over time and is not magnetic. Its connections will be soldered, so if you see silver at the joints you have copper. You may have what is commonly known as “flex” tubing. It can be either PEX or PE Tube. Pex is the stronger of the two and would usually be the one used for supply lines. It is white, might have PEX on the side. If there is any doubt then take a section to your supply house to see what you have and what fittings fit.

Now that you know what size meter you have we need to determine flow. That’s coming soon. Stay tuned.

Want to Have an Impact? How about an impact rotor?


Which came first: the lawn sprinkler or rain? Well, rain. Then lawn sprinklers. Well, no, I guess flooding and then maybe ditch irrigation and then someone poured water from a pot onto plants and …never mind. I’ll just skip ahead.

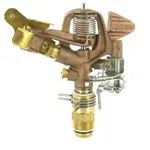
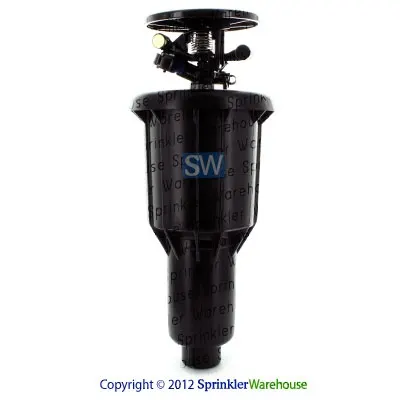
Brass Impact RotorThe impact rotor sprinkler was the first successful, efficient area sprinkler developed. The original design came about in 1933 from a farmer looking for a more efficient way to irrigate his citrus crop. Pouring water out of a pot just wasn’t doing it. It would not be an exaggeration to say this sprinkler revolutionized agricultural irrigation and is still an integral part of irrigation today.

One of the indicators of a good design is to look at how much something has changed through the years. A 1925 pickup had a drop tail gate, stake pockets, leaf springs, and was available with an 8’ bed and 1 ton rating. Sounds a lot like current pickups. If you saw the first impact sprinkler you would see that the design has changed little through the years. Arm still swings, it still rotates and it is still dependable. It would work fine today.

Impact rotors work best on large, open areas. Typical operating distances are from a low of 20’ up to 65’ in the residential applications and over 100’ in commercial uses. They provide consistent, dependable coverage with little maintenance required. Most give you rotation settings of a partial circle from 20°-340° or full 360° coverage.

What are the main advantages? There are a couple and they are important. The first is that the water path is uninterrupted. On standard, non-popup, rotors it doesn’t go through any filters or screens; it flows through just like the water from the end of a hose. This means the impact sprinkler is far less susceptible to clogging from debris. It also means there is very little risk of damage from grit and sand in the system. It just blows out.

The second is the exposed operating mechanism. With more modern design popup rotors there is an internal gear drive mechanism. This is vulnerable to dirt or debris in the water and can cause the rotor to stop turning. At this point the rotor must be disassembled to clean. With the drive mechanism of the impact being 100% external and with no gears to worry about, the durability and long term performance of the unit is greatly enhanced.

Pop-Up Impact RotorOne objection to impact sprinklers was their high visibility even when not being used. The Rain Bird Maxi-Paw acts as a pop-up, disappearing when not in use. It gives you the benefits of an impact rotor with the visual appeal of disappearing pop-up. One big advantage of these is you can use them to efficiently water a park or public area yet avoid trip hazards.

Impact sprinklers are thought by some to be ‘old technology.’ After all, numerous new and different irrigation products have come along since. Well, hammers are pretty old technology and no one hesitates to use them. Old doesn’t mean useless. The technology might be old but the usefulness and efficiency has increased through the years. With different sizes, replaceable nozzles, pop-up designs and water saving features the impact rotor looks to be around for a long time. It just works.

Teflon Tape and How To Use It


Teflon Pipe TapeTeflon® tape (polytetrafluoroethylene, or PTFE), AKA plumber’s tape, is a thin film used to seal pipe threads. The tape is durable, flexible, and fills in the minor imperfections in the threads to seal leaks.

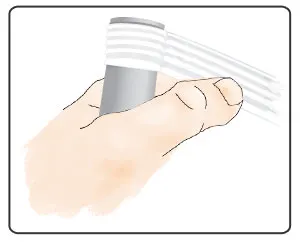
To use, hold one end of the tape against at the start of the pipe threads/end of pipe and start wrapping opposite of the direction of the threads, keeping the tape flat. Pull the tape Wrapping Pipe with Teflon Tapetightly into the threads but not so tightly that the threads cut through. Keep going in a flat uniform manner until you come to the ends of the threads/pipe. Now thread the pipe in carefully and you’ll have a good seal.

You want more than one layer but generally not more than three or four. If you are using drastically different materials, such as copper or brass to PVC, you may need extra but that is unlikely. Too much tape is as bad as too little. It will prevent a good seal. With the proper amount the pipe should thread together smoothly, sealing all gaps in the thread.

When do you not use plumber’s tape?

This tape is only effective on tapered threads as it uses compression to form the seal. Fortunately, the vast majority of the connections you make in irrigation will be with National Pipe Thread Tapered Thread, or NPT, and this tape will work well.

Many will tell you that brass to brass fittings are self sealing. In one manner they are but it takes an experienced professional to know which ones will work. You risk a leak if you are not sure you have the correct condition. Tape is cheap insurance. Brass fitting threads also tend to be extra sharp, especially on the smaller pieces, and may cut through the tape and ruin the seal. In this extra care is needed. In extreme cases you might need pipe dope but that is rare. The general connection involving brass in an irrigation system is with the backflow. Plumbers tape should work just fine there.

Pump Installation for Irrigation


Ok. The water is in the lake and you want it on your yard. This means you need a pump to move the water from the lake to your irrigation system. Choosing the pump is addressed in another article. We’ll talk about how you put it in and what you need to do it. Pumping from a well is the same basic procedure.

Basically we will have a pipe, probably PVC, going down into your water supply, up through a pump and into your system. So let’s start with the pipe and the water. If you are lucky you have lots of fish in your lake. Unfortunately, you also have sediment, plants, bugs and other things that will not go through your sprinkler heads. The first thing to install is some sort of filter/strainer. It fits on the end of the pipe and keeps the larger trash out.

Foot Valve

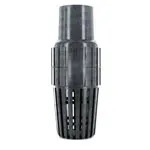
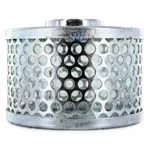
One type of filter is a foot valve. This is a combination of a filter and a check valve. A foot valve keeps the water in the pipe even when the pump is turned off. This means that the pump is kept wet (primed) and water is at the pump as soon as you turn it on. If water ran back down to the lake the pump would only have air to pull. This is an example of a foot valve and strainer combination. They can be PVC, aluminum, brass or steel.

Basket Strainer

Some other options are a basket strainer or a self-cleaning strainer. If you use either one of these, you will need a check valve, too, or the pump will not stay primed. The exception to this is if you have a self-priming pump. A basket strainer or self-cleaning strainer is all you need then.

Now we have PVC pipe running up hill to the pump. The end in the water must be secured to something: dock, pier, post, etc. It cannot float free or it will break. The size of the PVC will be determined by your pump. For both looks and freeze protection you might want to bury the pipe. If you leave it above ground you will need to stake it down and possibly insulate to protect from freezing.

The pump itself will need to be bolted to a concrete slab and connected to your pump switch and controller.

So what do we need and why?

At the pipe end/strainer:

To fasten to a post:

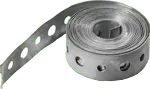
Galvanized strapping

  • Strapping. Usually galvanized, available at almost any hardware store. Available in rolls or pre-cut to length.
  • Nails, should be galvanize, 16p.
  • Claw hammer.
  • Tin snips to cut strap.
  • Leather gloves and eye protection

To fasten strainer/foot valve to pipe:

  • Drill, preferably cordless
  • Good, grounded extension cord if your drill is not cordless
  • Assorted drill bits
  • Phillips and/or slotted screwdriver
  • DO NOT PUT THE EXTENSION CORD IN THE WATER. Please don’t.

For the PVC:

  • Primer and cement
  • Hacksaw
  • Pipe tape (commonly called Teflon tape, even though it’s not)
  • Saw horses or cinderblock to lift pipe off ground while cutting.
  • Pipe and fittings, determined by pump and location
  • Tape measure. Measure everything twice. Trust me.
  • If placed above ground you will need some sort of stakes to hold the pipe in place

For the Pump:

The pump needs to be bolted down to a slab. If possible, buy one pre-made. If you need to make one follow factory recommendations and you will need:

  • Board 1”x4: to length for framing.
  • Saw, hand or power
  • Hammer for nails and stakes
  • 1”x2”x12” stakes
  • 8p or 10p nails. Duplex/double head are best
  • Wire mesh or #3 rebar re-inforcing for concrete. Some stores sell pre-cut.
  • 24” bolt cutters if you have to cut your own rebar
  • Tie wire (also known as baling wire) if you tie your own rebar
  • Pliers, preferably side cutters.
  • Bags of concrete for slab
  • Something to mix concrete in: bucket, wheelbarrow, etc.
  • Bolts to mound pump to concrete. See factory recommendations.

Miscellaneous:

  • A bucket or hose to put water in the pump to prime and to mix the concrete
  • Shovel for digging ditch and mixing concrete
  • Rags
  • Wire nuts
  • And if you are like me, a first aid kit.

Who do I ask? Not me. I just do irrigation repair. You need to talk to…


Well, not me, that’s for sure. I’ll tell you why. First, the questions being asked:

  • Why are my leaves yellow?
  • What fertilizers do I need?
  • What plants should go behind my house in the shade?
  • Is my soil absorbing enough water?
  • What is the best herbicide for my yard?
  • Are you married?

Actually, I don’t get the last one a lot. If ever. The rest come up frequently in every variation. Why? What makes me such an expert? Well, I’m a licensed irrigator and I’m doing work in the customer’s yard. That makes me an expert on plants, right?

Did you see where I said I was a horticulturalist, botanist, gardener, arborist or even farmer? No? Well, I am related to a number of farmers and one horticulturalist but the knowledge is not DNA based. It is training, experience and education based. My training tells me how to get the water to your yard efficiently and economically. It doesn’t tell me what you need for your particular soil and landscaping. The question now is: who knows? How do you find the information you need? I’m going to work backwards, from the big guns down to local experts.

The Big Guns

In every county of the country there is a county extension agent. Every county of every state and Puerto Rico, no matter how small the population. As of this writing, Loving County, Texas is listed as the smallest county population in the nation with less than 100 people. Actually, only 82 as of the 2010 census but someone may have broken down there since. Loving County has a county extension agent.

Get to know your county extension agent. They know their business, help is generally free and their resources are vast. They can help with plants, fertilizers, insecticides, herbicides and general advice. To find yours, go to the United States Department of Agriculture Cooperative Extension System.

The more information you give them, the better they can help. One very important piece of information is the makeup of your soil. It’s more than just dirt. It has all kinds of important chemicals that can help or kill your plant, such as lime, phosphorus, potassium, calcium, sodium, nitrogen, iron and more.

Finding out what is in your soil is very easy and amazingly cheap. Most states have at least one college that has an agricultural program that will test your soil. Some soil tests run as low as $10. Many I found were only $15. Send them a sample, give the results to your county agent, listen to the advice and get ready for a very healthy yard.

The universities listed here are purely random and provided as a country wide sample. The links will give you an idea of what tests are available. To find one in your area go to your web search engine and enter your state name and ‘soil analysis’. You will find one.

University Websites With Soil Analysis Services
University:
Website:
North Dakota State University http://www.ndsu.edu/soils/services/soil_testing_lab/
University of Idaho http://www.agls.uidaho.edu/asl/services.htm
University of Maine http://anlab.umesci.maine.edu/default.htm
Virginia Tech University http://www.soiltest.vt.edu/
Kansas State University http://www.agronomy.ksu.edu/soiltesting/p.aspx?tabid=34
University of Hawaii http://www.ctahr.hawaii.edu/Site/ADSC.aspx
Utah State University http://www.usual.usu.edu/
Texas A&M University http://soiltesting.tamu.edu/

Local Experts

Don’t want to go through all that? No problem. The key to finding good local advice is finding someone you can trust and who has experience in your area. These are both important. I’m pretty trustworthy, I think, but you don’t want my advice on anything outside of my garage.

Get to know your local nursery. Real nurseries, not bulk distributors. Ask for any accreditations or degrees the company or its employees might have, such as Certified Nursery Professionals, horticulturist or botany degrees, arborist, master gardener certification, etc. There are national and regional certifications. Don’t hesitate to ask. They’ll be glad to show them to you. Find out how long they have been in business in your area. When you are satisfied, start asking questions. I have never found a nursery that was not more than willing to help.

Talk to a professional landscaper. Again, feel free to ask them for their credentials. Being a member of a regional landscape association is nice and can be of benefit but it’s not the same as that degree or certification. Ask for those. They should be proud to share them.

One note about professional landscapers: don’t expect it to be free. County agents and colleges are government funded. Your local nursery hopes to get your repeat business. A professional landscaper’s income is based on his/her knowledge and experience. Most of it is hard earned. It would not be right to ask them to give it away free. While they might give general advice just for goodwill, expect to pay a fair price for a real consultation. Since they can come to your house and see the actual conditions and plants they may be well worth the expense.

Who do you not ask, besides me? Your neighbor, for one. Plant damage can take a while to show. A good yard today doesn’t mean they didn’t just put down way too much fertilizer and it will be burned tomorrow. Some people think the best weed killer is gasoline or diesel. Care to guess what diesel does to your soil? It’s effective. No weed will ever grow there again. Nor anything else.

Ask a professional. You and your yard will benefit for years to come.

PVC Pipe Leak Repair


Irrigation systems are designed to put water where it is needed in an effective manner. When water appears in new, unexpected places there is a good chance you have a leak. Fortunately, with most systems being made out of PVC, repairing the leak is relatively simple. We’ll go over a number of products and explain how each works, including one that handles galvanized. The first step is to make sure the system is turned off. Having a system come on while you are kneeling over it repairing a leak is an experience to avoid.

There are two important things to remember when you dig up the broken pipe. The first is BE CAREFUL. Don’t try to get all the dirt in one scoop. First, it’s bad for your back. Second, if you push too hard and end up hitting the pipe you could cause a brand new leak. When digging up a pipe it is best to take smaller, careful cuts to ensure that no other damage occurs.

Second, when you find the damaged area make sure to dig a few inches deeper and to each side. The system will have water in the pipe, waiting to get out. This water will want to flow out the handy opening you have just revealed. Digging extra deep allows for the water to drain below the pipe. Also, regardless of the type of patch you put in, you will need clear access to the bottom of the pipe. If you cannot dig deep enough to bring the water level down you will have to bail or pump it out. You will also need to dig to each side a little to give yourself working room for the repair.

Once you have found the leak you need to decide on what type of repair kit you need. All except one needs PVC primer and cement. We’ll discuss the exception first.

Compression FittingsPVC Compression Fitting

This can be used on either PVC or galvanized pipe. A compression fitting relies on pressure on a rubber seal to stop the leak. The compression collar and “O” ring slip on the pipe, the pipe slips in both ends, the collar is tightened and the leak is repaired. They have a number of advantages. Not needing cement means the pipe does not have to be completely dry to repair. If you need to you can do the repair while the water is running. Don’t laugh. It happens. They are quick to install and dependable. The primary disadvantage is they do not work for leaks at or near a fitting.

Leak Stopper Rings

Leak Stopper Rings

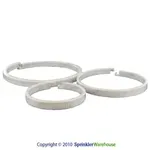
If you have a small leak at the junction of a pipe into a fitting, but the pipe and fitting are not cracked, it’s possible you have an area that was not completely glued. Rather than cutting out the entire fitting for a minor leak you can use a Leak Stopper Ring. These go around the pipe, both the ring and pipe are primed and glued, then the ring is pushed hard against the fitting. The glue creates a permanent bond with the ring, the pipe and the fitting, stopping the leak.

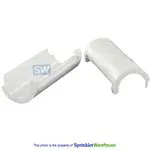
Snapper Repair CouplingsPVC SnapLock Repair Fitting

Snapper Repair Couplings are the Duct Tape of PVC: just wrap it up and it will hold. Snapper Repair Couplings are like two halves of pipe split lengthwise. A great advantage of these is you do not need to cut the pipe. The inside of both halves of the coupling and the outside of damaged area of the pipe are primed and cemented. The halves are snapped in place around the break and you have a permanent repair.

Pipe Dream FittingsPIPE Dream PVC Repair Fitting

Like many brilliant ideas this one is deceptively simple. Fittings and couplings tend to be a standard size. If you have a broken line you need to cut the break out. Now you need to reconnect the ends. To do this with standard fittings and pipe you must cut out a larger section of pipe, install fittings and install the new pipe. More work, more gluing. This is particularly hard if a corner or T fitting is involved. The simple idea of Pipe Dream is make the fitting extra long. Because they are longer than the standard coupler, elbow or tee Pipe Dream is able to completely cover the damaged area without the need for additional parts or supplies. Simple.

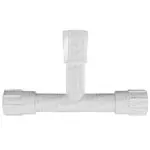
Kwik-Repair TeesPVC Kwik-Repair Tee

This is another “why didn’t I think of that” product. KwikRepair Tees are simply a replacement section of pipe with the slip fit couplings already installed. The couplings are pushed in to the shortest length. The broken pipe section is cut out to a matching length. The KwikRepair Tee is then put in place, the Tee and pipe are primed and cemented, and the couplings are pulled out to full length. Job done.

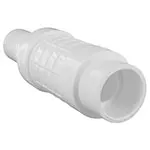
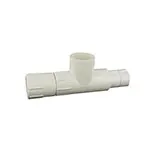
Quik-Fix Telescopic Repair CouplingPVC Quick-Fix Telescopic Repair Coupling

A Quik-Fix coupling is simple and quick. Simply cut out section of broken pipe slightly longer than compressed Quik-Fix, apply primer and glue to fittings and expand Quik-Fix to fill the gap. Leak repaired. A great advantage is, because the fitting expands, there is some small room for error in how big a section of pipe you remove. For example, if you cut 1” less than the suggested length the Quik-Fix will still work. You just don’t expand it all the way. However, don’t cut too long, they don’t stretch.

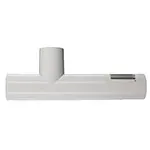
Pipe FixPVC Pipe Fix Repair Tee

Pipe fix give you more options in your repair. It is a section of replacement pipe with the fittings already in place. This provides a one piece, no hunting for parts, repair. It also offers the option of a straight repair or adding a Tee joint, allowing replacement of a failed Tee or the option of installing a new line.

Primer and CementFast Setting PVC Cement

Regardless of which method you choose all of these require a quality primer and cement, excluding the compression coupling.

For More Information

For more information about anything involving irrigation, please visit us at www.SprinklerWarehouse.com.

How often should I water my yard?


The answer to this question varies as greatly as the climate across the country. The amount needed on the Gulf Coast of Texas would starve grass planted in New Mexico. Region, grass type and soil all play a part.

I’ll attempt to give some general answers first. Then I’ll try and get more specific.

An often used rule of thumb is that your lawn should receive at least 1 to 1 ½” inch of water per week. However, how often you water also depends on weather, area restrictions, grass types and more. Under watering is as common as overwatering. It may be more common, especially during high heat times. Under watering causes shallow roots, making the grass more vulnerable to stress. Eventually the grass turns brown and dies.

Many are not aware of the problems caused by over watering. Your lawn needs moisture, nutrients, and air to grow. If you water too much, you can saturate your soil to the point where air cannot get to the roots. The lawn basically suffocates. So a water balance is very important.

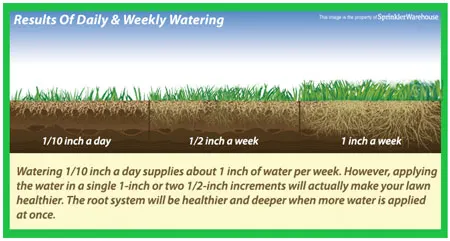
Generally you want to water in such a way that the water penetrates 6” to 8” into the soil. This helps establish deeper roots for your grass. On a recent test in a public park in Houston, Tx, a generally well watered area, grass roots were found going down more than 12”. This is an example of the difference between a little every day and a lot on one or two days a week in absorbent soil. Look at the root depth chart that follows.

Daily versus weekly watering chart

Another consideration is how short you cut your grass. Taller grass helps shield the soil from heat and retains moisture better. Try to avoid extremely short settings on your mower.

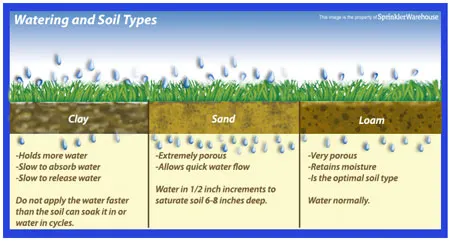
After all this I still haven’t told you how often to water your yard. Ok. Here’s my answer, sort of. Figure that your grass needs about 1” to 1.5” per week. You also want to water in such a way that it soaks into the soil to enough depth to encourage root growth but does not run off due to non-porous soil or sloped yards. Look at this illustration:

How to water different soil types chart

In clay you might want to water three or four times a week, about ¼ inch per time, twice a day. Since clay absorbs water so slowly you won’t risk water runoff. With sand you can have water absorb past the depth the grass can use it. In this case you might water ½” at a time, three times a week. This should keep it moist. In loam you can often get away with twice a week, ½” to ¾” at a time. The loam will absorb and hold the water for a long time. Remember to water in the early morning, before the wind and sun comes up to dry out the yard.

There really is no set rule – every other day, once a week, or every third day. The best thing to do is be in tune with your lawn. By doing so, you will notice signs when your lawn needs a drink.

I would like to offer one piece of advice that I know is good: get to know your local nursery or your area county agent. Also, most areas have a college that does research into local growing patterns. Their information is very valuable and usually free. The lawn in Maine varies greatly from that in Louisiana and that in Oregon. You local experts are your best resource.

For More Information

For more information about anything involving irrigation, please visit us at www.SprinklerWarehouse.com.

But it is cheaper this way…irrigation parts, performance and problems.


A fact: some parts are cheaper than others. I’ll give you another fact: sometimes the cheaper part is as good as or better than the more expensive part. Why then wouldn’t you save money by buying the cheaper part?

There are a number of ways to save money. Sometimes it is by buying the least expensive part. Other times it may be by buying the most expensive part. Sometimes it is by cutting coupons. It’s a mixed bag. So how do you get the most return on your dollar? Simple: buy the most efficient product for your system and your life style; the product that works best with your system, providing the best service over a period of time. But best doesn’t only mean mechanically. It means best as in “efficient mechanical performance with the fewest demands on the owner’s time and effort.”

Nozzles

Let’s talk about sprinkler nozzles for a moment. We’ll compare Rain Bird, Hunter and K-Rain in a 12’, full circle spray. There is about a $0.50 spread from low to high. They all work; they all put out 12’ of water in a full circle. The yard gets wet.K-Rain Sprinkler Nozzle

The problem is the Toro nozzle puts out 2.19 gallons per minute (GPM). The other two put out around 2.65 GPM. So if you have a system with Toro nozzles and put in one Hunter or Rain Bird nozzle then that area will be over watered, harming the grass, water will be wasted and you will pay for that wasted water. Conversely, if you put a Toro head on a Hunter zone then that area will be under watered, may start to suffer and you’ll wonder why. The least expensive is whatever is the most efficient for your design. To find the correct nozzle for your system, go HERE.

Rotors

Let’s look at rotors for a moment. We’ll compare the Hunter PGP against the K-Rain RPS75. These two rotors are almost identical in design. However, the nozzles they come with are not. If you have 40 psi of water pressure and you need to spray 40’ their water volume differs. One uses 3.0 GPM, one uses 4.3 GPM. Your system will be designed for one or the other. If you mix them then one area will be over watered or another will be under watered. Cost to you if you install the wrong ones? Lots of head scratching and frustration as you watch lawn problems develop.K-Rain Rotor

Remember, a well designed system will water your yard in the most economical and efficient manner possible. As in many things, consistency and uniformity are important. When you change the design by mixing in unmatched parts just to save a few dollars, or more expensive parts because you like the brand name, you can cost yourself money, time and stress wondering why your yard is no longer as healthy as it was.

More Information

As always, you can come to Sprinkler Warehouse for more information. We’ll be glad to help.

Drip Tubing Basics and Drip Irrigation System Basics


What is Drip Tubing?
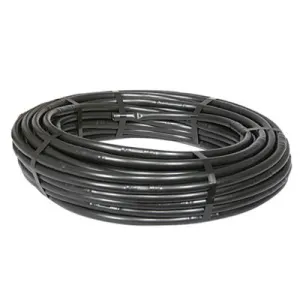
Tubing for Drip Irrigation Systems

Drip Tubing

Drip tubing is used in the delivery of water directly to the roots of plants. Specifically, drip tubing is made from polyethylene and has emitters that are placed at intervals along the tube that correspond with the placement of each plant. This ensures that water is delivered directly to each plant’s root zone. Irrigating in this manner is not only very precise and efficient, but it also conserves water because of the low flow-rate that is required.

In arid locations, drip irrigation is an essential method of maximizing water usage and has been a standard for centuries. There is even evidence that ancient civilizations used clay pots that were buried in the ground as a primitive method of drip irrigation. The pots would be buried near plants and filled with water. Over time, water would slowly seep from the pots and into the soil. In this manner, each plant received a constant and direct source of water.

What Does Drip Tubing Do?

Drip irrigation, via the use of quality polyethylene drip tubing, is both an economical and efficient way to irrigate most forms of plant life. Due to the fact that this method of irrigation has an efficiency rate of over 90%, this is especially true in areas where water is scarce. Because of the low flow-rate and direct application to the roots of the plant, using drip tubing for irrigation also reduces evaporation and runoff.
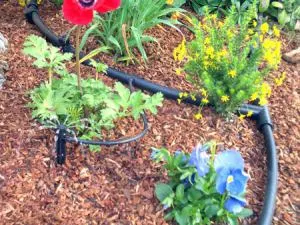
Drip Irrigation System

Drip System

Drip irrigation is scalable and can be used for both commercial and residential applications. Drip irrigation also limits disease because the tubing is delivering water directly to the root zone of a plant. By minimizing water contact on the stems, leaves and fruit of a plant, waterborne disease is virtually eliminated. Using drip tubing for irrigation also keeps the rows between plants dry. This allows for easier access to the plant and reduces weed growth. Other benefits include less leaching of nutrients and water under the root zone and increased success over rough terrain.

When Should You Use Drip Tubing?

Drip tubing for irrigation purposes can provide benefits to nearly any type of agricultural endeavor. If you are a homeowner, drip irrigation provides an efficient way to water a multitude of different plant life from perennials in a landscaped flower garden to a backyard garden filled with fruits and vegetables. Drip irrigation is especially useful in situations where water usage may be limited or in locations where water is scarce.

Because of its flexibility, drip tubing can also be used for irrigating irregularly shaped or narrow areas. Drip tubing can be shaped to the contours of the rows of plants or landscaped areas.

Drip irrigation is also very useful during times of drought. In many cases, because of its efficiency, it may not be subject to water restrictions that are imposed during these times. Using drip tubing for irrigation is also considered a very “green” irrigation solution and as such it is an excellent way to conserve and even recycle water.

The Nuts and Bolts of Drip Tubing and Drip Irrigation

Now that you’ve decided to embark on a journey that involves drip irrigation, it’s a good idea to take some time to learn a bit about what you’ll need in order to develop your drip irrigation system.

What Sizes of Polyethylene Drip Tubing Are Available?

If you are a homeowner who is developing your own drip irrigation system, it is important to understand the differences in the sizes of drip tubing. It’s especially easy to become confused about the differences in 1/2-inch drip tubing, and this can lead to problems with buying the correct size of fittings.

Drip tubing and polyethylene tubing both come in various styles and sizes ranging from 1/8-inch to 1.5-inches or even larger. There are differences between the OD (Outside Diameter) and ID (Inside Diameter). These differences are shown with this list of the most common sizes of drip tubing.

Polyethylene Tubing:
1/8-inch – .125″ ID x .187″ OD
1/4-inch – .170″ ID x .250″ OD
3/8-inch – .375″ ID x .500″ OD

1/2-inch polyethylene tubing is available in three different configurations:

1/2-inch – .520″ ID x .620″ OD
1/2-inch – .600″ ID x .700″ OD
1/2-inch – .615″ ID x .710″ OD

3/4-inch – .820″ ID x .940″ OD
1-inch – 1.060″ ID x 1.200″ OD

Drip Tubing:
1/4-inch – (5mm) with .170″ ID x .240″ OD

1/2-inch drip tubing is available in two different configurations:

1/2″ – .550″ ID x .640″ OD
1/2″ – .570″ ID x .670″ OD

Remember, with 1/2″-inch tubing that you need to have the and ID and OD that corresponds correctly with the size of fittings that you will use. If these sizes do not match precisely, there can be a wide variety of problems like leaks, blow-outs or stripped threads on fittings.

Drip tubing is normally sold in lengths of 100, 500 or 1,000 feet. It is black in color and has a high resistance to sunlight. In normal sunlight situations, drip tubing will last for about 30-years.
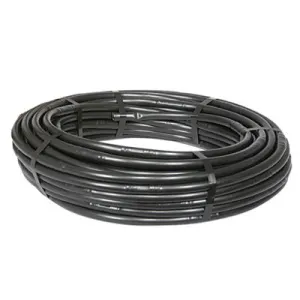
Emitter Tubing

Emitter Tubing

What Types of Drip Tubing are Available?

There are several different types of drip tubing that are available for a drip irrigation system.

Emitter tubing – For most drip irrigation systems, emitter tubing is the standard. This tubing allows for spot placement of water. In the case of factory-made emitter tubing, emitters are placed at even distances along the length of the tube. This type of tubing is a perfect choice for rows of evenly spaced plants. In custom systems designed for a landscaped area, emitters are manually placed along the tube to correspond with the placement of various plants.
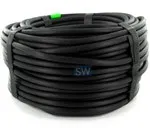
1/4" Distribution Tubing

1/4" Distribution Tubing

1/2-inch distribution tubing – This tubing is generally connected to the main water supply and brings the water to the 1/4-inch distribution tubing, soaker tubing or emitter tubing.

1/4-inch distribution tubing – This tubing connects the 1/2-inch tubing to various types of emitters such as misters, emitters and sprinklers.

Soaker hoses or tubing – These types of emitters are porous hoses that can be connected directly to an outside faucet, rain barrel or garden hose. This type of hose can be laid around your different plants and water will seep from the walls of the hose and into the ground around it. The difference between soaker hose and drip line is that the delivery of water is much less accurate. You could compare a soaker hose to sweating because the water comes out along the entire length of the hose.

Soaker tape or drip tape
– This emitter is similar to a soaker hose. It is made of either porous material or has hundreds of tiny holes along its entire length. The main difference is that drip tape is much thinner and in many cases will only last for one season. This tape can be used above or below ground and is very good for delivering water to wider areas that might need it. One example is within an area that has dense foliage.

Micro tubing is another useful component for irrigation systems. This type of tubing generally comes in 1/8” and 1/4” sizes and it can be used as the main and sub lateral tubing for a drip irrigation system. It is also used to connect emitters. Micro tubing can generally handle up to 15 gph.

How Do I Determine What Type of Drip Tubing to Use?

A simple answer to this question is that it will vary depending on what your needs are. If the intended use of the drip irrigation system is for rows of crops in a garden or trees in an orchard, factory-made tubing with its evenly spaced emitters is the perfect choice. If, however, you are designing a system for a landscaped yard that has plants at various intervals throughout the entire yard, emitter tubing that requires manual placement of emitters is the correct choice.

If you decide to landscape your yard in a different manner each year, soaker tubing may be a good choice since it is something that requires annual replacement. The size of your irrigation zones will also factor into this equation. One of the most important things you should do is draw out a plan then use string to determine the proper lengths of the tubing you’ll need.
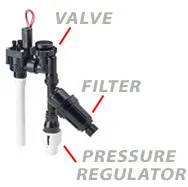
Above Ground Control Zone Kit

Above Ground Control Valve Control Zone Kit

What Components Are Used in a Drip Irrigation System?

In a nutshell, there are several essential components in a drip irrigation system. Each system will require a main waterline, control valves, pressure reducer, backflow prevention, pressure regulator, filter, various tubingadapters and fittings, air vents, drip tubing, emitters, filters and an end cap or flush valve.

Main Water Line – This is the beginning of a system. In the case of a landscaped area around a residence, the main line is usually alongside the house and extends from the foundation or outside wall of the home. A main water line can also be run underground to a central point within your irrigation layout.
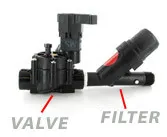
In-Ground Control Zone Kit

In-Ground Control Valve Control Zone Kit

Control Valve – This component controls the flow of the water from the main water line or throughout the various areas of the irrigation system. Control valves may be operated manually or, with a bit more expense, may be automatic. Depending on the type of system that is installed, there may be one or more control valves.

Pressure Reducer or Regulator – Since many systems operate with maximum efficiency at lower water pressures, a pressure regulator may be required to help lower the water pressure coming from the main water line outside of a home.
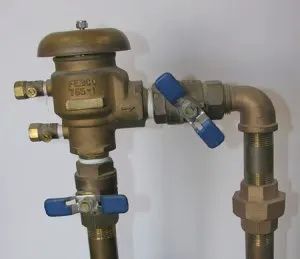
Pressure Vacuum Breaker

Backflow Preventer

Backflow Prevention – Emitters sit directly on top of soil or beneath soil. If water that has been emitted into the soil seeps back into the drip line and up to the main line, it may very well contaminate your entire water supply. In order to prevent water contamination in your main water supply, it is of the utmost importance that your drip irrigation system has a backflow suppressor.

Filters – A filter with a 150-mesh or 200-mesh screen will help prevent the buildup of different minerals and particulates in the emitters. Filters will also protect the valves on your drip irrigation system.

Drip Tubing or Dripline – This is the tubing that has emitters installed on it. If you are using factory-preinstalled emitters, this tubing will have the emitters placed at the same intervals along the length of the tubing. Manually installed emitters can be placed at varying intervals.
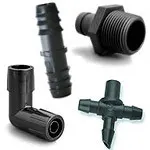
Drip Irrigation Fittings and Adapters

Fittings & Adapters

If your irrigation needs are focused on plants that are spaced at regular intervals, dripline is an easy choice. This type of drip tubing comes in multiple lengths from 50-feet to 1,000-feet. In most cases driplines can be found that have emitters placed at 6-inch, 9-inch, 12-inch, 18-inch, 24-inch, 36-inch or 48-inch intervals. In some cases, depending upon the type of application, driplines may come with even larger intervals.

Air Vent – In order to keep air out of the emitters during the times that the system is shut down, an air vent should be installed at the drip tube’s highest point.

Drip Tube Fittings and Adapters
– This equipment includes tees, couplings, adapters and ells. These are the components that are used to connect the drip tubes to each other and to control valves or the main waterline. It is important to note that the fittings should be the correct size for the tubing you use. In many cases, using the incorrect size fittings will result in a blowout.

End Caps and Flush Valves – In order to keep the water from just flowing out of the end of the drip tubing, it is necessary to have a flush valve or end cap. A flush valve is simply a valve that is placed at the end of the drip tubing. It is kept in the off position until the tubing needs to be flushed (generally once per year). An end cap is exactly what it sounds like: a cap that is screwed onto the end of the drip tubing.
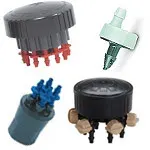
Drip Irrigation Emitters

Emitters

Emitters – Within the list of equipment needed for a drip irrigation system, we’ve saved emitters for last. Emitters are one of the most important components of the drip irrigation system. Emitters are basically small plastic valves that are installed along the length of the drip tube. The sole purpose of an emitter is to keep a continuous and uniform flow of water near the root zone of the plant.

There are two primary categories of emitters: pressure compensating emitters and turbulent flow emitters. Pressure compensating emitters are used in situations where there is a disparity in elevation of greater than five-feet. Turbulent flow emitters, also known as tortuous-path emitters, are used when the irrigation area is level.

Keep in mind that all emitters provide some type of pressure compensation. However, a pressure compensation emitter, by definition, will keep the water’s flow-rate constant regardless of the water pressure. For instance, a pressure compensation emitter should keep water flowing at the same rate whether it is at a pressure of 1.0 bar (15 PSI) or 3.0 bars (45 PSI).

Strictly speaking, the main benefit of using a pressure-compensating emitter is that if you have an area that is hilly (with an elevation of over 5-feet) then pressure-compensating emitters will maintain the water’s flow-rate throughout the system. One thing to always be aware of is that, as a general rule, pressure-compensating emitters should not be used when your water pressure is very low.

As you can imagine, the flow-rate of a pre-installed emitter is one of the most important parts of the drip irrigation equation. Emitter flow-rates vary quite a lot, however, the most common flow-rates that are used for home irrigation systems are as follows:

2.0 liters per hour (1/2 gallon per hour)
4.0 liters per hour (1 gallon per hour)
8.0 liters per hour (2 gallons per hour)

When selecting the type of emitter, one item to be mindful of is the type of soil you have. The purpose of drip irrigation is to supply water directly to the root zone of a plant. In order to do this, the water needs to be absorbed by the soil immediately or it will evaporate or there will be run-off. If your flow-rate is too high, you’ll end up with excess water around the plant that either runs off or evaporates. Specifically, the higher the density of your soil, the slower your flow-rate needs to be. Soil that is high in clay, for instance, is very dense and tightly packed and absorption is very slow. From a practical standpoint, if you have loose, sandy soil, you should consider emitters that have higher flow-rates because the absorption rate will be much faster.

Rules of the Rows

When constructing your drip irrigation system, there area few things to consider. You might consider these to be the rules of the rows. The first thing to consider is the length of your mainlines and lateral lines.

Regardless of anything else you might learn about drip irrigation, the number one rule you have to consider is that the laws of physics always apply. This becomes incredibly important when considering the length of your mainlines and lateral lines. As a rule, the overall length of both cannot exceed 120 meters (400 feet).

Typical sizes for mainline and lateral lines can vary, but the following guidelines are relatively standard across all drip irrigation systems.

| Flow Range in GPM | Mainline Pipe Size | Lateral Line Size |
——————————————————————————-
| 0-3 | 1/2” | 1/2” |
——————————————————————————-
| 3-6 | 3/4” | 1/2” |
——————————————————————————-
| 6-10 | 1” | 3/4” |
——————————————————————————-
| 10-20 | 1 1/4” | 1” |
——————————————————————————-
| 20-30 | 1 1/2” | 1 1/4” |
——————————————————————————-

Drip tube length is another consideration to factor into the overall design of the irrigation system. The overall length of the drip tube cannot be more than 60 meters (200 feet) from the water’s point of entry to the end of each tube.

When designing a system, the designer needs to take several things into consideration. Total coverage area, types of plants to be irrigated and type of soil are the major requirements have been determined you can select the proper hardware to ensure proper flow-rates.

How to Install a Basic Drip Irrigation or Sprinkler System
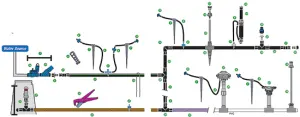
Drip Irrigation SystemInstallation of a basic drip irrigation or micro sprinkler system is relatively simple. The first step is to design your layout based on what you’ll be using the system for. Once you’ve acquired the proper equipment, you can begin assembling the system. What follows assumes that you have the correct tools and equipment and are familiar with it.

Step 1 – Attach the vacuum breaker to the pressure regulator. This will keep water from backwashing into your home water supply.

Step 2 – Connect your filter to the pressure regulator then attach the hose swivel to the opening on the side of the filter. Connect everything to your hose bib.

Step 3 – Lay your tubing out according to your design. Be sure that emitters are positioned so that they are close to the root zone of each plant.

Step 4 – Place ground stakes at intervals along your drip tubing to secure it into place. The hook at the top of the stake should fit over your drip tube.

Step 5
– Once all of your tubing has been laid out, install the correct sized pipe fittings and make sure to tighten them then attach an end clamp, end cap or flush valve at the end of your line.

Step 6 – Test the system. If you see problems within your system, this will be the time to fix them. Following are some simple troubleshooting techniques that can be used to fix a drip irrigation system.

Obviously, this is a very basic installation, but the same principles apply to larger jobs. Specifically, though, it’s a matter of careful planning and attention to detail.

Troubleshooting Your Drip Tubing Irrigation System

Q. No water is coming from an emitter, what should I do?
A. Clean the emitter or replace it depending on how clogged it is.

Q. The tubing or emitter has blown off, what’s wrong with my system?
A. Tube or emitter blow off is caused by too much pressure in the system. The easiest remedy is to add a pressure regulator to the line that is causing the problems.

Q. There are leaks between my fittings or between pieces of tubing. How do I fix this?
A. First, check the connections and ensure that they are tight. If you’re dealing with a small leak in the pipe, you can use a dresser coupling to fix the leak. For larger leaks, you may need to cut out the damaged section of the line, insert an additional length of drip line and use fittings to seal the connections.

Drip irrigation is a tried and true method for maximizing the efficiency of delivering water to your plants. Once you’ve planned, installed and used your drip irrigation system, you’ll be on your way to more effective and cost-saving irrigation.

Where to Buy Drip Irrigation Parts and Supplies

For more information about drip irrigation system repair, troubleshooting drip irrigation systems,  drip irrigation controllers, drip irrigation pipe or emitters, or to purchase new drip irrigation parts or supplies, go to www.SprinklerWarehouse.com.