The sprinkler rotor keeps moving and the spray head won’t budge. Which one is right?


Congratulations. You just bought a football team. Now you have a football field to water. You decide to use pop up spray heads with a 15’ radius. You can get a very efficient pattern of coverage with only 147 spray heads. Of course, you’ll constantly repair them as the players will stomp them into the ground. If, after a tackle, a player comes up with a spray nozzle in his nose I extend my sympathies to you.

How about planting a flower garden? Oh, about 6’ wide x 20’ long. Now I’ll use a rotor to irrigate it. For highest efficiency I’ll plant the rotor about 20’ past the end of the garden, spraying back in. I’ll also set it’s rotation to the standard minimum 40o angle, which means it also waters an extra 21’ of yard at the end of its arc. Hope that doesn’t hit your sidewalk.

People get confused about which type of sprinkler to use. On the one hand rotors put out a lot of water and move all around. Must be good, right?
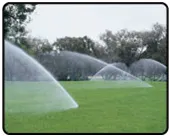
Spray heads have a fixed radius, usually 15’ or less, and just serenely apply this efficient fan of water. No wasted movement, no back and forth agitation. Must be good, right?
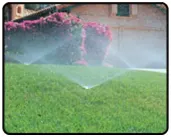
The decision on which to use is simple. Answer these questions and the answer falls into place.

1. Is your distance less than 25’? If so, go with popup spray heads. The most popular rotors can’t get any closer than 22’, usually 25’ plus.

2. Wide open area? More than 25’ each direction? Rotors would work.

3. In a planter? Spray head

4. Following the curve of a walkway? Spray head

5. Narrow strip between houses? Spray head

6. Open area now, as in question #2, but you intend to put in planters later? Spray head

7. Football/baseball/soccer field? Rotors

8. Around your deck and pool in back yard? Spray head

The differences

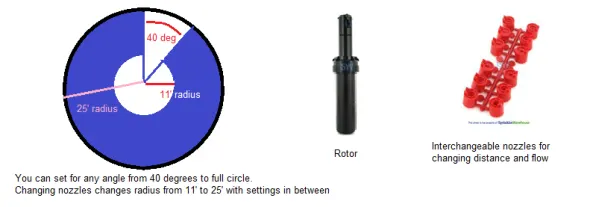
Rotors are designed for open areas. They spray a large volume of area in a back and forth motion, either full or partial circle. Typical distances for residential are 22’ to 50’. There are some that will go down to 15’ but these aren’t normally used in good efficient designs. They are usually used to fix a problem somewhere or to help compensate for a bad design.
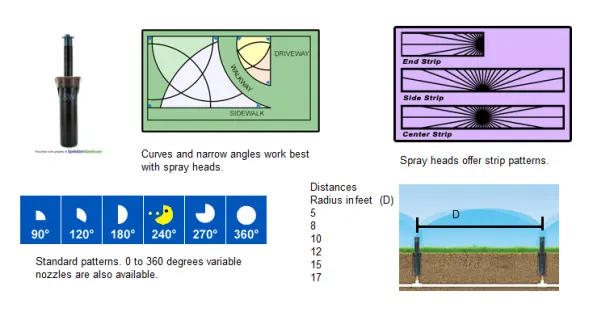
Spray heads are usually used on pop up bodies. They spray a consistent amount of water over a fixed area. They are available in various radii and patterns, along with adjustable pattern spray heads. This makes them very adaptable to any situation. In the eight questions above, notice that only two indicate rotors. Also that #2 and #7 are essentially the same thing, so only one situation fits rotors. After that, it’s spray heads.
Or drip. But there is already an article on that.

The Fourth of July and what I can’t do.


Well, I tried and couldn’t do it. Couldn’t figure out how to tie the Fourth of July into irrigation systems.

You’d think this would be easy. I’ve tied in zombies, Corvettes, the Bellagio and the Nile river into some aspect of irrigation: stream rotors, insecticides, nozzles and water barrels.

These have, admittedly, been a stretch at times.  Big stretch.  Can’t do it this time.

Instead, the staff at Sprinkler Warehouse hopes that you and yours have an enjoyable holiday. This is the day that started our country. On July 4th, 1776 the Second Continental Congress approved the Declaration of Independence, one of the most important documents in history. It’s the reason we are here. It’s a great day to enjoy and celebrate our freedoms.

Be careful with the fireworks. From experience I’ll tell you that you don’t want to hold bottle rockets in your hand, firecrackers going off in an open palm DO hurt, you don’t want to bend down to see if the rocket fuse is really lit, if you drop your sparkler don’t try and catch it by the wrong end and the best way to enjoy fireworks is to sit back and let someone else do the work.

Y’all have a good holiday.

Pipe Dreams? Or PVC Pipe dreams? There is a difference.


If you don’t know the difference we can’t help you here. This is not that kind of a blog. If you have nightmares about figuring out which pipe to use for your irrigation then we can help.

PVC stands for polyvinyl chloride. PVC is easier to say. PVC pipe accounts for about two thirds of the water distribution market, including drinking, irrigation and waste. So far the material has been found to be inert, meaning it doesn’t absorb or release harmful chemicals. Unless you burn it. Don’t sniff burning PVC.  It’s no fun, painful and the smoke can be hazardous.

The most common question we get is a two-parter: what size pipe should I use and what kind: Schedule 40 or Class 200? Knowing the differences can help you create an efficient system.

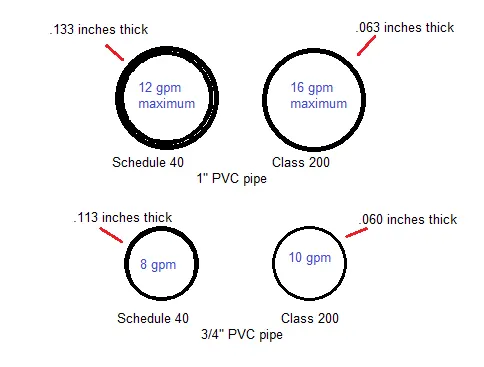
Remember the old “a picture is worth a thousand words” quote? I’ll give you a picture now and you can decide if you want to skip the other 476 words.

Let’s talk about Schedule 40 pipe first. It is the simplest. Schedule XX designates the wall thickness at a certain size. For example, a 1” pipe in schedule 40 has a wall thickness of .133”; schedule 80 has a wall thickness of .179”. Higher schedule = thicker wall.

You will care about this later. It does get more interesting, hopefully.

“Class” pipe is different and the original definitions go back to steam boilers. We’ll skip ahead. Class 200 pipe, the most common class pipe used in irrigation, is rated for 200 pounds per square inch pressure (psi) and has a wall thickness of .063” for a 1” pipe. Notice that is a lot thinner than schedule 40. This is about to become very important. Schedule 40, in comparison, is rated for 450 psi. This is not as important.

The average irrigation system is designed for about 30 to 50 psi. Plenty of safety factor built in. It is not, however, as much as you think. A poorly designed system can experience water hammer and a 60psi line can experience frequent surges of pressure up to about 170 psi. Still within safety range.

Now we can get into the “why do we care” part.  Everything in irrigation ties into gallons per minute. Your spray head puts out a certain number of gallons per minute (gpm). Your design revolves around it. If you have 13 gpm you can put six 2 gpm heads on that zone. Or four 2gpm and four 1 gpm. (Never design to the absolute max gpm.)

Look at the cross section of ¾” and 1” pipe both in schedule 40 and class 200. Check the comparative flows in the picture above. This difference in flow can make a big difference in how you design your zones. There are friction loss/flow charts available to help you.

So what do you choose? The rule of thumb is to use schedule 40 for the main line. Run it from the water meter, through the backflow and to the valves. Then use class 200 for the laterals, or after the valves.

Why schedule 40 when it allows fewer gallons per minute? Because the thick wall makes it tougher, harder to break. Your main is under constant pressure; the laterals are under pressure only when they are active and it is an open-end system. Before real pressure can build in your laterals the water is shooting out the sprays, keeping pressure down. Schedule 40 is more resistant to shovels (its sworn enemy), tent stakes, car tires, kids, dogs and other puncture/crack pressures.

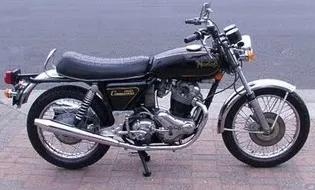
There are exceptions to everything. There are situations where an entire system should be done in class 200 pipes. Same for schedule 40.  Now that you know the difference you can make a more informed decision and start dreaming about better things, like a 1973 Norton Commando.

Backflow = upchuck? Eeeewww…


Most people know they need a backflow for their irrigation system. They just don’t know why. I’m going to work this backwards. First I’ll show what can happen if a backflow is missing or broken. Then I’ll tell you how they work and why you want one for your system.

From the West Virginia Department of Health and Human Resources: “One of the most highly publicized cases of a backflow incident occurred in 1969 at Holy Cross University. The football season was canceled due to a large outbreak of infectious hepatitis among the team members. It was determined that backflow through an unprotected lawn sprinkler system at the practice football field caused the epidemic. Children carrying the hepatitis virus routinely played in puddles around the sprinkler heads. Fire fighting demands in the vicinity caused negative pressures at the sprinkler heads backsiphoning the contaminated water into the drinking water supply to the field.

One of the most famous cases of backflow occurred in California. A laborer had been using an aspirator attached to a garden hose to spray a driveway with weed-killer containing arsenic. At sometime during his work, the water pressure reversed. The man then disconnected the hose and unwittingly drank from the hose bib. Arsenic in the waterline killed him.”

Thirsty yet? Try this from the Environmental Protection Agency: “In 1991, an atmospheric vacuum breaker valve intended to protect a cross-connection between an irrigation system and the potable supply malfunctioned, allowing backflow of irrigation water into the public water system. The water system, located in Michigan, was contaminated with nematodes, rust, and debris.

In 1981, chlordane and heptachlor were backsiphoned through a garden hose submerged in a termite exterminator’s tank truck in Pennsylvania. An undisclosed number of illnesses occurred, and 75 apartment units were affected.”

THE BASICS If you lose water pressure to your house, for whatever reason, the water in the house will flow out to the main line. Because pressure is now reversed, going from house to main line, it creates a siphon effect and will pull anything in the sprinkler system and in the puddles around the sprinkler system with it. If your garden hose was on at the same time it becomes a siphon hose. Now all the fertilizer, insecticide, animal waste and many other things you don’t want are pulled into the drinking water.

GARDEN HOSE Notice the two involving garden hoses? How many of us drink from a garden hose when working outside on a hot summer day? Ever use that same hose to put out pesticides or fertilizer? Have a backflow preventer on the hose bib? Cheap, cheap protection.
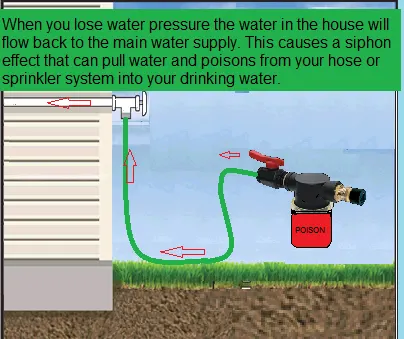
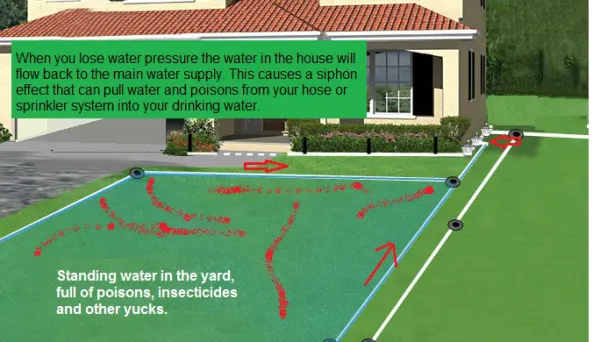
I think it is important at this time to note that our very talented graphics department has absolutely nothing to do with the illustrations in this article. I stole their work and added my own touches.  I get the blame.

IRRIGATION SYSTEM Same principal. Have another bad drawing. A backflow works by shutting down the irrigation water line when you lose water pressure. The simplest works just like a stopper in your bathtub: a plug falls down, blocks the line. They get far more complicated, depending on application.

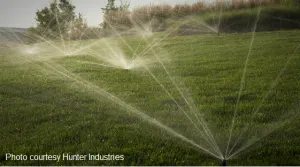
Don’t listen to your neighbor, me, anyone else on what type of backflow you should get. Ask your city or county or your water provider. In my area a pressure vacuum breaker is plenty. Two miles away a new jurisdiction starts and they insist on double-checks. Always verify local code requirements first.

To find out the different types of backflows look at the backflow section on sprinklerwarehouse.com. To learn more about how they work check out backflows in Sprinkler School.

And stop drinking from your garden hose until it’s protected. Lemonade sounds better anyway.

Can’t afford a trip to the Bellagio? Stream rotors + your music + your lawn chair = you’re there!


The fountains at the Bellagio, Las Vegas, are world famous. They are designed to take you away from stress and trouble with their combination of dancing water, music and light. They are not, however, designed to keep you from gambling.

Each performance is a unique interpretation of a classic piece of music.  Their definition of classic covers a broad spectrum: Mozart, Glenn Miller, the Beatles and more. I hope they are working on Hank Williams. That might take a while. His work is pretty complicated.

If you can’t make it to the Bellagio, bring the fountains to you. Get stream rotors for your yard. You will enjoy the relaxing show and you will water your yard at the same time. Having a beautiful yard helps you relax even more. You benefit in many ways.

Stream rotors are different from standard rotors in that, instead of blasting a great deal of water out of one nozzle, they produce multiple streams of water of lower volume. These streams come out at different angles, some high, some low, ensuring even coverage. If you have sloped land the slow, even coverage minimizes the chance of water runoff. Blasting gallons of water every minute at sloped land just encourages runoff, as the soil cannot absorb the water as fast as it is applied.
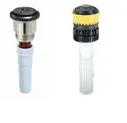
In traditional stream rotors the Toro 340 is the answer. Designed to replace impact or gear driven rotors with a ¾” inlet it covers from 15 to 30 feet. It also has 9 easily set patterns to cover most any area. Great coverage, great application.

Don’t have a commercial application? Looking for the Bellagio effect at your home? No problem. In the last few years a number of manufactures have developed stream rotors that fit standard pop-up spray assemblies. The stream nozzles simply swap out with the standard spray nozzles and you are in business. Rain Bird and Hunter have every situation covered.
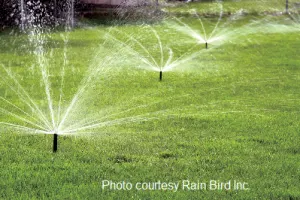
Not sure why you want to get rid of your old nozzles? Two good reasons come to mind. First, the stream nozzles cover up to 30 feet, where spray nozzles stop around 15 to 17 feet. This means that in many systems you can have the same coverage while eliminating a number of heads, saving water. Second, stream nozzles are not as sensitive to breezes as spray nozzles. The droplets are bigger and heavier; they go where they should when standard sprays are being blown away. Wait, I’ll add a third, no charge.  A zone with stream rotors can use 30% to 40% less water for the same coverage. Less water = less money.

The reason for their efficiency lies in their pattern. Small streams, slow application and constant, even movement add up to  more consistent, usable irrigation.Take a look at the spray pattern below.

Notice how closely it matches the Bellagio fountain pattern? Quality knows quality.

So turn on the stream nozzles, add music, sit back and enjoy the show. You can charge your neighbors admission if you wish. After all, look at the money you saved them by bringing the Bellagio to them.

Designed to Fail? Ooops…Don’t let your irrigation system laugh at you.


If you are old enough you remember the Pinto.  New Coke?  The Newton?  Zune? Mars Needs Moms?  Trying to cover all bases here. These are all products that failed due to poor design.  The strange thing about a good design is you don’t notice it.  A bad design slaps you in the face, causes trouble, often costs money and talks bad about your dog.

Ok. Irrigation designs don’t talk about your dog but a bad one will cost you time and money, along with increasing your stress level. Dry spots, swamps, water runoff, irrigating your neighbor’s yard and watering in the rain are all problems caused by bad design. To quote someone, somewhere “It don’t ever have to be that way no more never.” (I put the ‘never’ in to cancel the double negative.)

Irrigation planning is involved and challenging and simple and logical. The great thing about residential planning is so much of the work is done for you and there are companies that will do it absolutely free. They send you a drawing, instructions and a parts breakdown. If you want to go that route check out Rain Bird and Toro.

If you want to design your own Hunter has a very good guide. There are countless references and books available and all the math has been worked out. The answers are in a chart somewhere. Check here for a sample. At first glance you may get dizzy, but don’t worry, the numbers make a lot of sense once you start designing a system.

Whichever system you use, make sure you mark and consider all trees, fences, storage sheds, etc. You can’t blame Rain Bird if you forget to tell them about the pool.

If you decide to have a professional design your system, which I strongly recommend, be sure to check their credentials. In Texas you must be licensed to charge for a system design. In other states you must either be a licensed irrigator, a licensed plumber, or a licensed architect. Some states don’t have any restrictions on who can design a system. That makes it tough. Ask for references. Ask to see their work. As a professional I’d be glad to let anyone see any system I’ve ever designed. They should be also. If not, something is wrong.

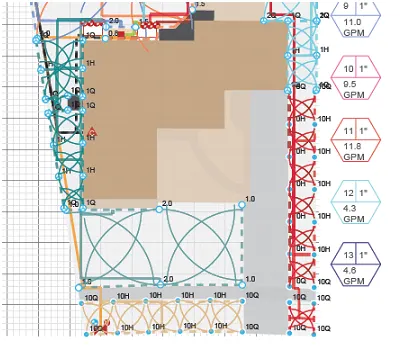
A good design should have a drawing showing you the locations of the spray heads, the piping, the controller, the backflow, the valves and the areas covered by each head and the flow.

Sprinkler system design layout on graph paperIn this sample you see the spray head location, the radius and pattern (10H= 10 foot radius, half circle, Q = quarter), zone number, size of pipe (1”) and gallons per minute. The pipes are shown, coverage is shown and the valves are located.

Very important: a good design will also include a parts list of all pipes, fittings, heads, wire, valves, etc. Do not accept a design that does not.

Now for the hard part: when you have a good design, follow it. Don’t decide in the field that digging 3 more feet is just too much effort. People get tired and figure anywhere in the general area is close enough. It’s not. You’ll realize that before too long.  Digging is hard work. Lots of digging of little trenches is real high on the “I’m sick of this” list. Keep telling yourself “the shovel is my friend. The shovel is my friend…”. It will be well worth it when that good design lets you forget all about it as your lawn and gardens flourish and you save money with efficient water usage.